When implemented properly, the technique of using a camera’s slow shutter speed paired with its Rear Curtain Sync mode can create a glorious ruse by illustrating a sense of motion in a still image.
Ever look at an image of a shark or fish where the body appears blurred, yet the eye, mouth, even the leading edge of its head is in focus? Or perhaps it’s an image of a bright yellow tube sponge shot from above, where the sponge itself seems to be in focus, yet the world below it appears to be spinning at high-speed leaving you with the question “OK, how did they do that”?
The secret, which isn’t really a secret, is setting a very slow shutter speed in combination with Rear Curtain Sync when using a flash.
Think about how our camera generally works. When pressing the shutter button, the curtain in front of the sensor opens for the duration of time (being a fraction of a second to a thousandth of a second), exposing the sensor to light for the prescribed period of time before closing.
The slower the shutter speed is brought down the greater the amount of light gets to the camera’s sensor. While this allows the sensor to capture a greater amount of information in low-light scenarios, the trade-off is that the image can be subjected to a degree of blurring, which can be caused by the subject moving and/or by how unsteady the camera is during shutter actuation.
One of the most conventional rules for daylight photography to ensure a crisp, clear subject is to use a shutter speed high enough to freeze the subject. Even when shooting something that isn’t moving, a shutter speed in the 1/125 to 1/180 of a second is often prescribed for reducing the effects of camera shake while hand holding the camera.
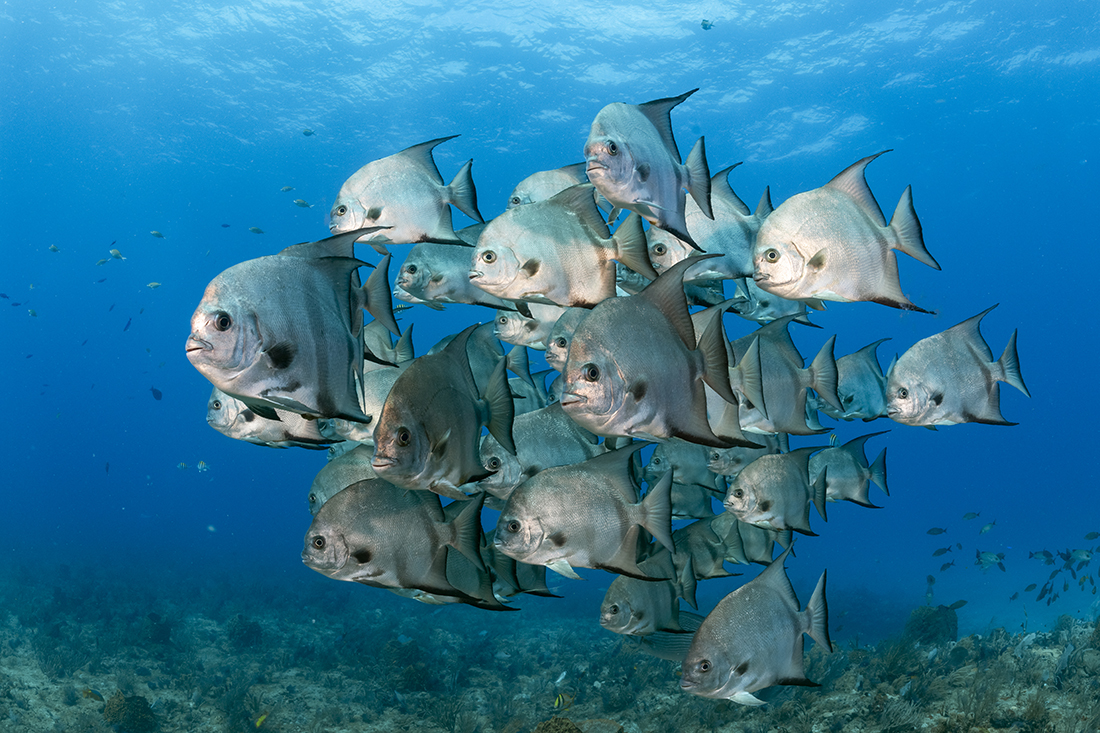
General wisdom dictates that having any kind of motion blur is seen as a negative distraction in an image. When shooting subjects in daylight like this school of spadefish I often select a shutter speed between 1/125 to 1/180 of a second, which is just fast enough to freeze them in their tracks.
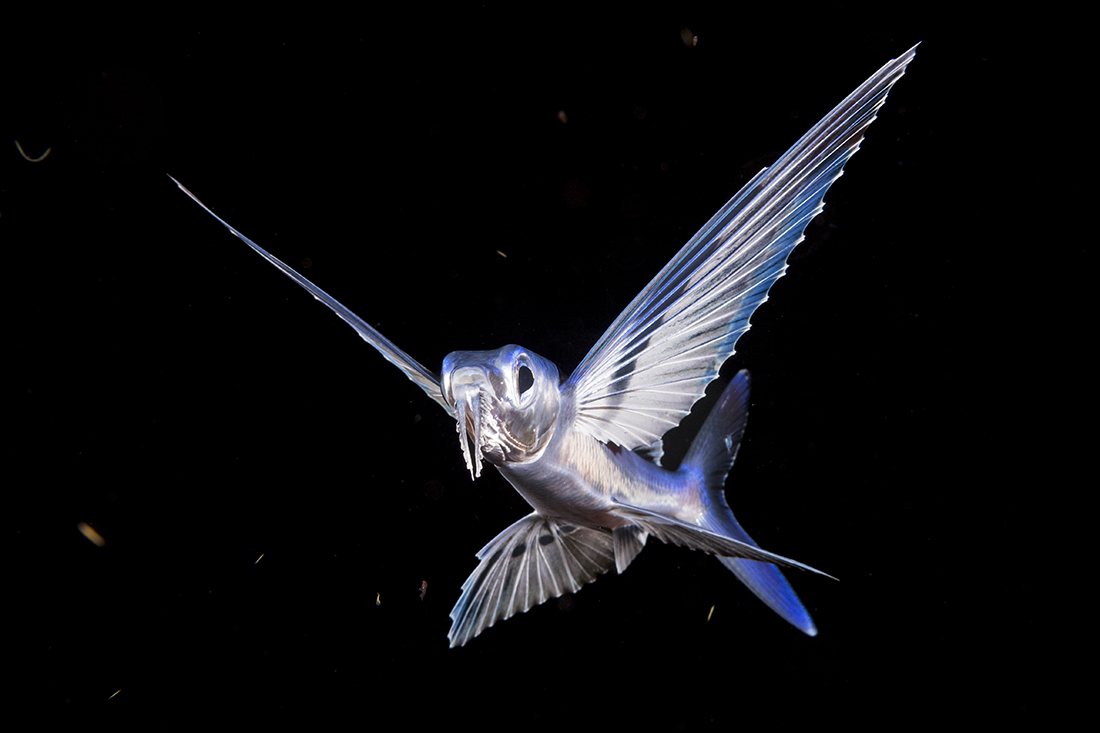
When there is little to no daylight involved, the use of a fast shutter speed is no longer paramount. This flying fish was taken during a blackwater dive, with the camera’s shutter speed set to 1/90 of sec. As you can see, the image is crisp and sharp with fish frozen in place, which was accomplished by the super-short duration of the underwater flash rather than shutter speed setting.
Front Vs. Rear-Curtain Sync
I won’t bother explaining the differences between how mechanical and electronic shutters work, I’ll leave that part to the measure-baters to show how smart they are.
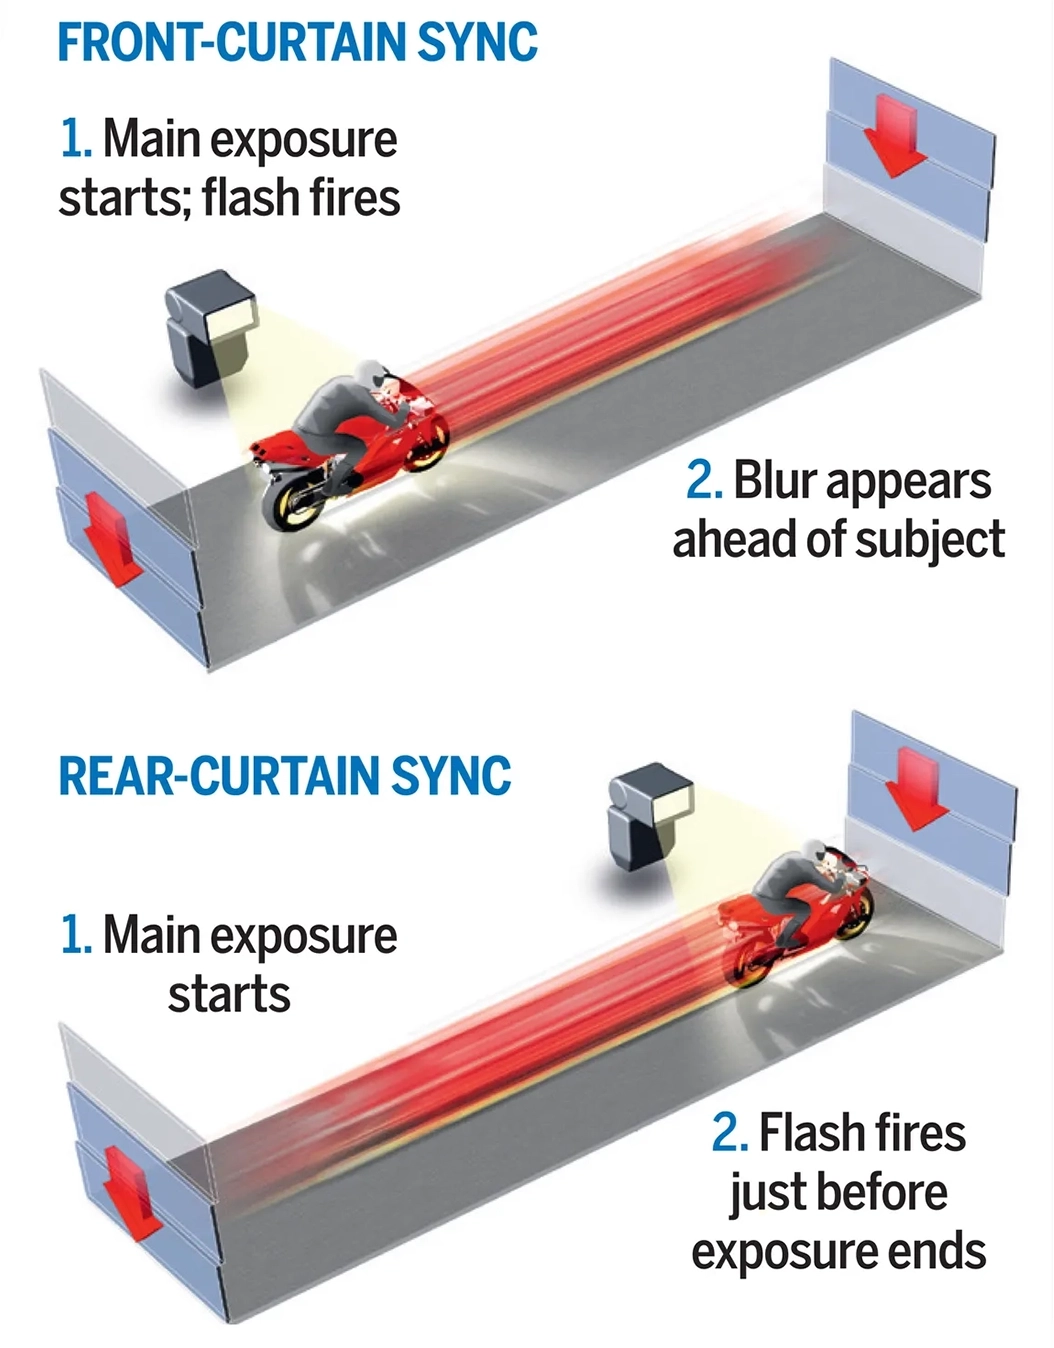
For the purposes of using a flash with most DSLR and high-end mirrorless cameras, the settings menu offers a choice between two primary flash modes: Front-Curtain Sync and Rear-Curtain Sync.
What these two modes do is to dictate how a given flash gun or underwater strobe will sync with the camera’s shutter.
Front-Curtain, sometimes call First-Curtain is generally the default setting in most camera systems. In this mode the flash fires at the beginning of the exposure. Have you ever seen an image of a car obviously in motion on a dark street where the tail end shows plenty of detail, but the front end is nothing more than a blur streaking away? That is a telltale effect of flash fill photography used in conjunction with Front-Curtain Sync.
Rear-Curtain Sync mode, sometimes listed as Second-Curtain, is the exact opposite. When the shutter is activated, the flash fires at the end of the exposure cycle.
For underwater photography, Rear-Curtain Sync is often the “default setting” even when the photographer is NOT deliberately trying to do shots with motion blur. When the exposure time is fast, it makes no difference whether the camera is on Front or Rear-Curtain Sync.
However, should that subject be moving faster than the shutter can capture, rendering some motion blur, the effect rendered through Rear-Curtain Sync will result in that blur looking more natural as it is trailing behind the subject.
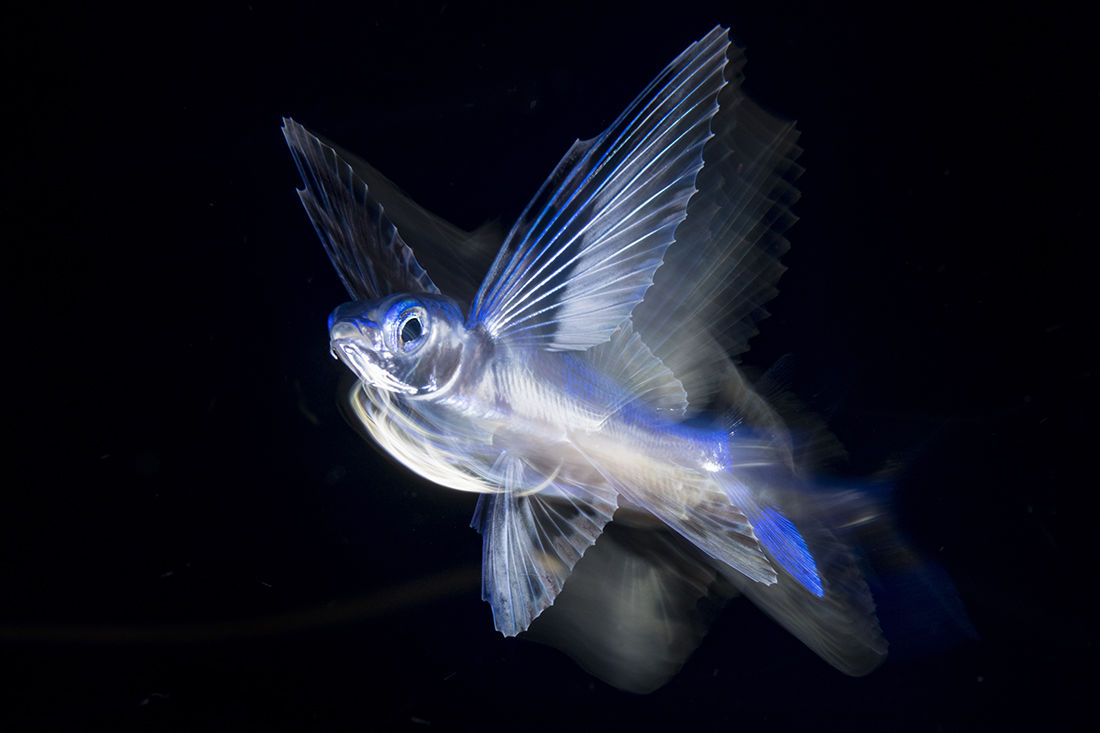
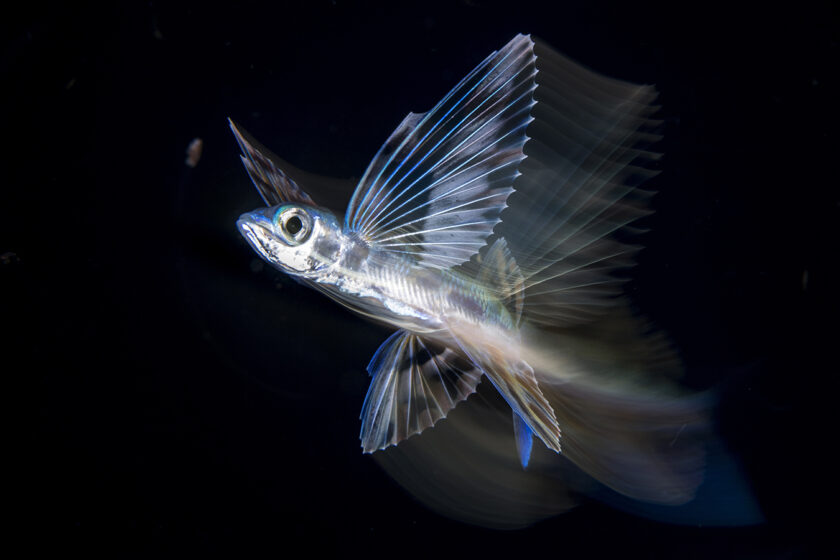
As a custom, I always have my camera set to Rear-Curtain Sync. Having a little fun with the same flying fish on the blackwater dive, I dropped the shutter speed drastically to a mere ¼ of a second for longer exposure duration to allow the focus lights I was using to partially illuminate it. My camera was set on rear curtain sync so that the flash was timed with the ending cycle of the exposure to render the illusion that the fish was jumping to warp speed.
In truth, the little guy was hardly moving.
The thing to remember is that the photo flash emits a single burst of light that is measured in small fractions of a second – typically between 1/300s – 1/5000s. At maximum power in manual mode, the flash duration of my Retra Pro Max strobes is approximately 1/3000 of a sec. / 3 milliseconds. The shorter the flash duration, the more effective the flash is at freezing motion and reducing blur.
A good example of this is those shots showing flying objects or liquids frozen in place that you see in ads. One of the most recognizable shots is one of a red apple the moment before it disintegrates after being pierced by a bullet, which was taken by Dr Harold E. Edgerton in 1964. FYI, Edgerton (1903–1990), nicknamed Papa Flash, was the inventor and developer of the modern flash photography techniques that made stop-action photography familiar today.
When paired with Rear-Curtain Sync, the flash will freeze a subject moving across the frame at the end, making the motion blur appear more natural, as it is behind the subject. For this reason, Rear-Curtain Sync is best for creating a more dramatic mood and sense of motion.
In daylight shooting scenarios where ambient light is on the low end, Rear-Curtain Sync lends itself well on large subjects such as sharks, fast-moving fish, and swimming sea turtles, as the strobes’ instantaneous flash is what stops their motion in the first place.
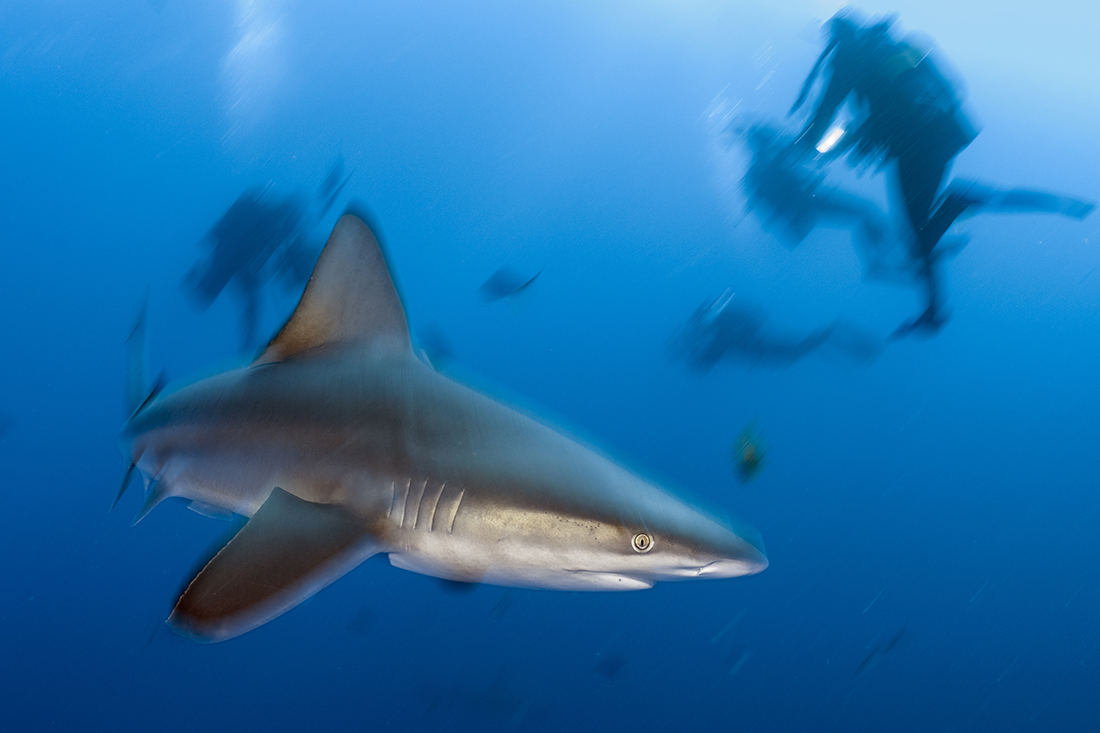
Look closely at this shot of a large sandbar shark passing by. The day was highly overcast, dropping ambient light underwater to almost twilight. To get a brighter blue in the background, I had two options: really raise my ISO to above 800 or drop my shutter speed below a 1/90 of a second. I chose the latter with a shutter speed of around 1/25 of a second using Rear Curtain Sync mode with my two Retra underwater flashes set on quarter power. The end result is a rich cast of blue with everything/everyone having a ghostly blur and the eye of the sandbar shark sharp and in focus. For a shot like this, it’s important to make sure that the subjects are not beyond the adequate coverage of your strobe or flash.
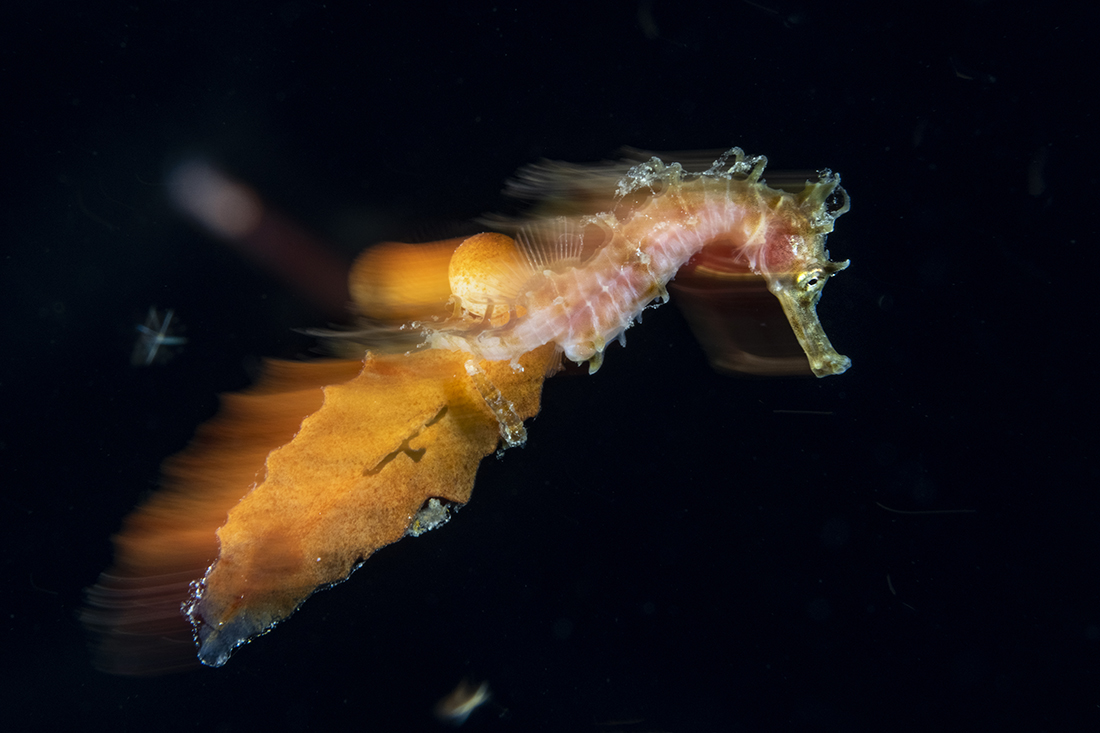
Another alternative for creating a sense of motion is using a slow pan to increase the sense of motion or to add an illusion of motion to a non-moving subject. This was the technique used for this tiny juvenile seahorse hanging on to a sprig of sargassum. Using the same process as on the flying fish, I integrated a short panning action from right to the left while the shutter was open.
Tips for Creating Effective Motion Blur
For the most control when adding motion blur, shoot in manual mode. You can work with almost any DSLR or Mirrorless camera so long as you are able to keep everything within your exposure triangle – shutter speed, aperture, and ISO. If you don’t want to go full manual, shutter priority mode lets you at least choose your shutter speed, leaving the camera to balance (with some limitations) the other settings.
1. Increase your ISO
ISO governs your camera’s sensitivity to light. My personal ISO baseline is between 200 and 400 ISO. However, I am not afraid to crank it up to 800 or even 1600 when working in a darkened environment where I need more light.
2. Go long on Your Exposure
Make your exposures long enough. Consider working at 1/30 all the way down to a full second. With moving creature(s) perhaps do a little panning in the direction it is moving in conjunction to having your camera in Rear-Curtain Sync mode. When such a technique is executed properly it will give an obvious sense of movement while at the same time keeping things such as the eye, mouth, and gills in focus.
3. Panning
One of the few advantages of using Front-Curtain Sync is when you are deliberately trying to introduce blur by panning your camera in the same direction as the subject is moving. This action often requires turning your camera at a higher rate of speed (referred to as “accelerated panning”) than the subject is moving, thereby allowing your strobes a better chance of freezing that subject’s position where it was when you initially press the shutter.
If the image comes out with a pronounced ghosting look ahead of the subject, you weren’t making your pan fast enough.
The one downside of using Rear-Curtain Sync on a DSLR with a really slow shutter speed is that you’ll hit a blind spot when the mirror is up blocking your ability to effectively track your subject until after your strobes have fired and the shutter recloses, resulting in the subject being part of the way out the frame.
Final Thoughts
As underwater photographers we aim to get images of a given subject with plenty of detail in sharp focus. This is most often achieved by setting your camera’s shutter speed to fast enough to hopefully stop a subject’s motion, while at the same time trying to factor a higher f-stop (which means less light gets through the aperture’s smaller opening) for greater depth of field. Again, general wisdom dictates that having any kind motion blur is seen as a negative distraction in an image. Hopefully, you can see that there are situations when having some sense of motion can add a more dramatic effect to an image.
When attempting to add motion blur into your images for the first time, you’ll likely encounter less than satisfactory results. Trust me, we have all been there, so don’t be afraid of undergoing a lot of trial and error. No matter how experienced we think we are, mastering underwater photography is a never-ending learning process.
